New Year Planner

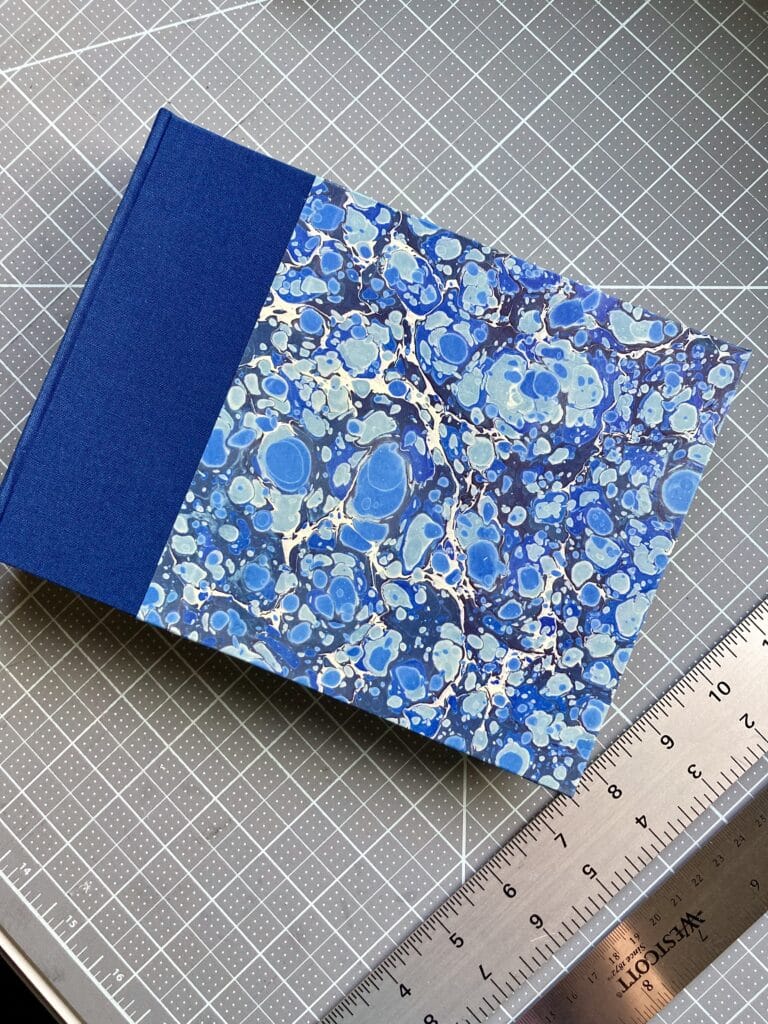
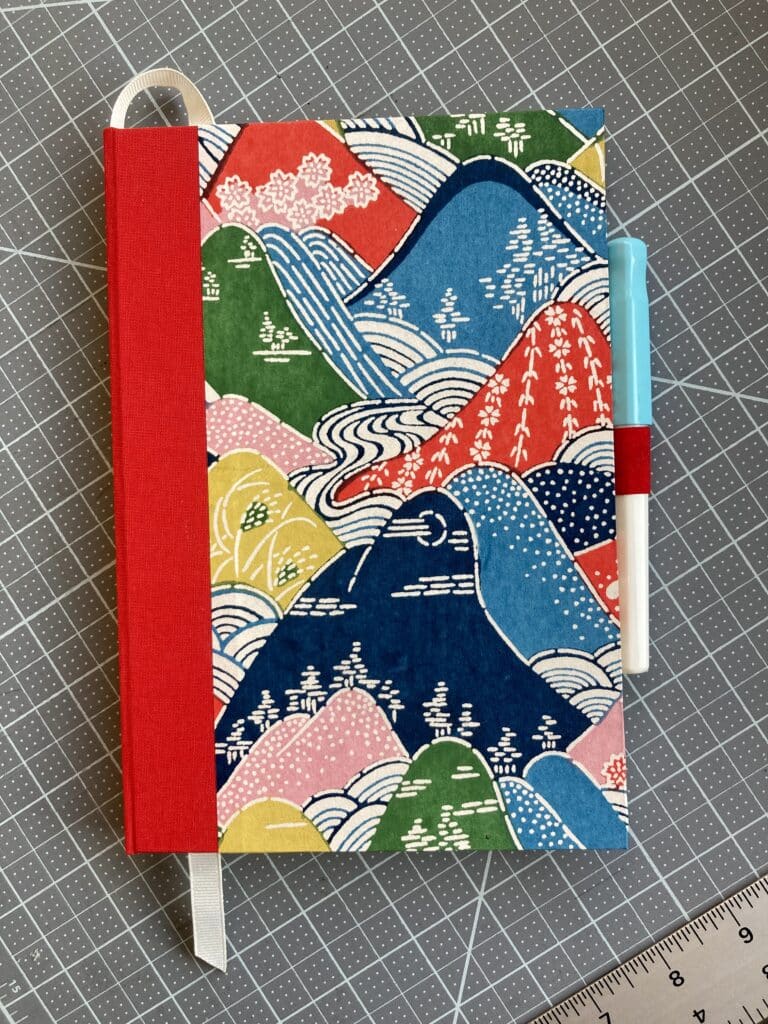
Over the last six-ish years, I’ve moved from a gridded bullet journal to the ready-made Leuchtturm weekly planners. (Of course I still use a paper agenda; you never know when you’re going to need to whip it out and take notes about something.)  Now that I know how to bind books, though, I thought I’d move back to a gridded bullet journal for 2024–one I MADE MYSELF:


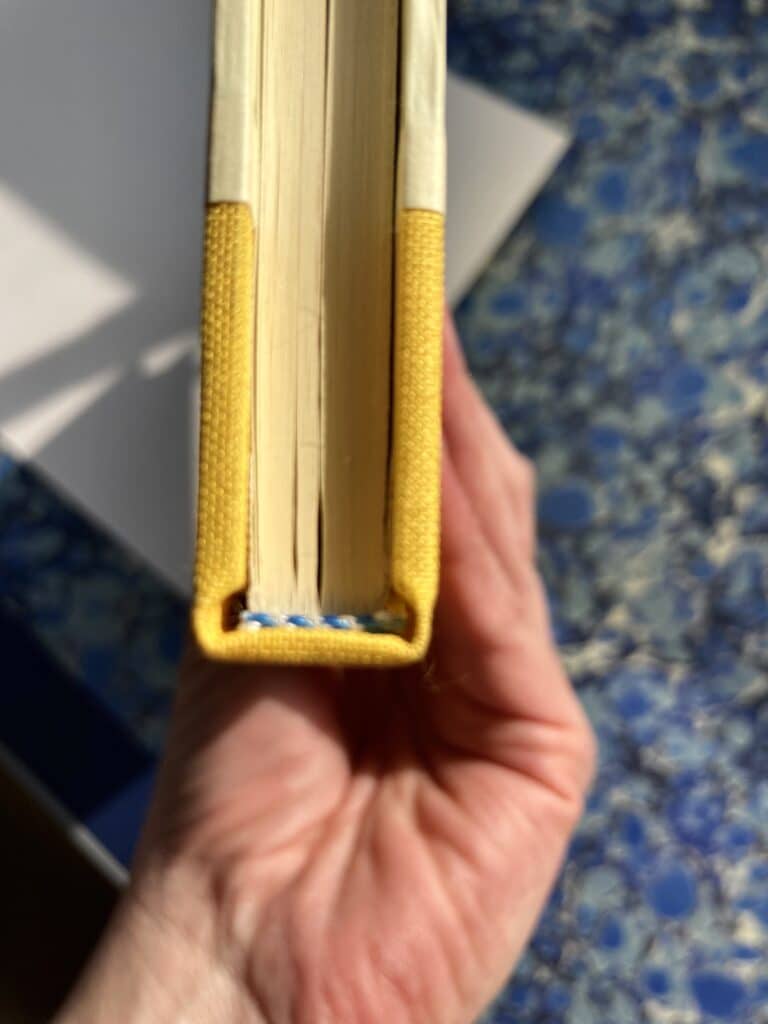
Yet again we can thank Hollanders for this project: They have unsewn graph paper signatures, which come already folded and grouped. Unlike their ready-made text blocks, though, I did have to sew the signatures together:
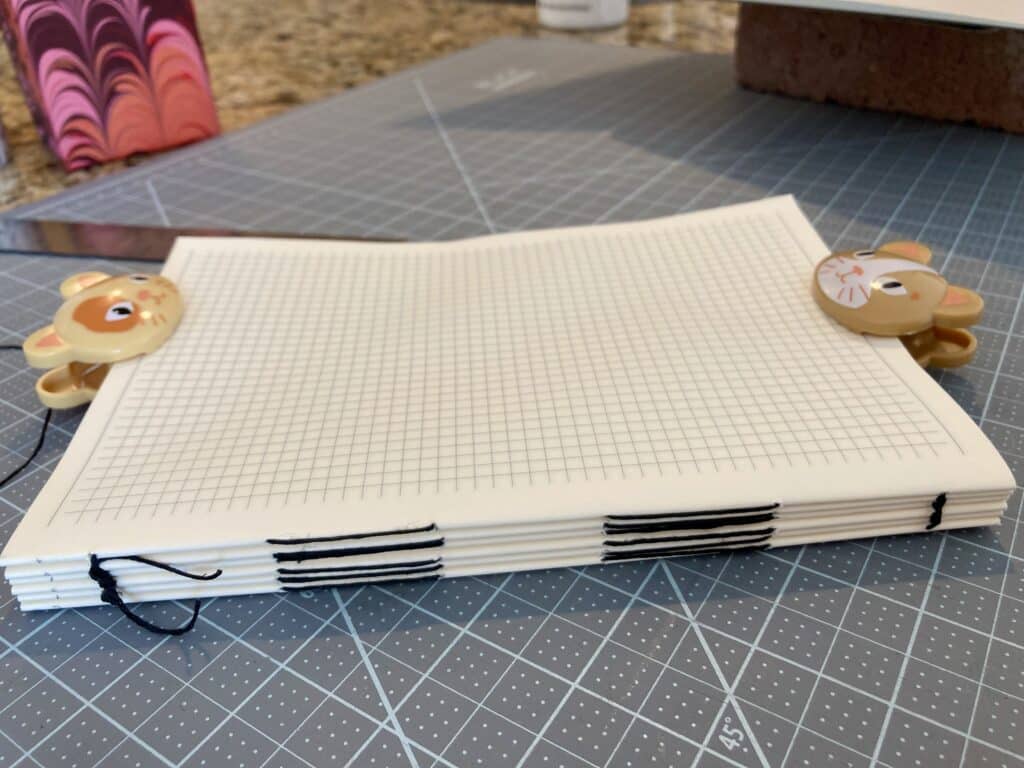
(That black linen thread is giving off Frankenstein’s notebook vibes, but it’s what I had on hand.)


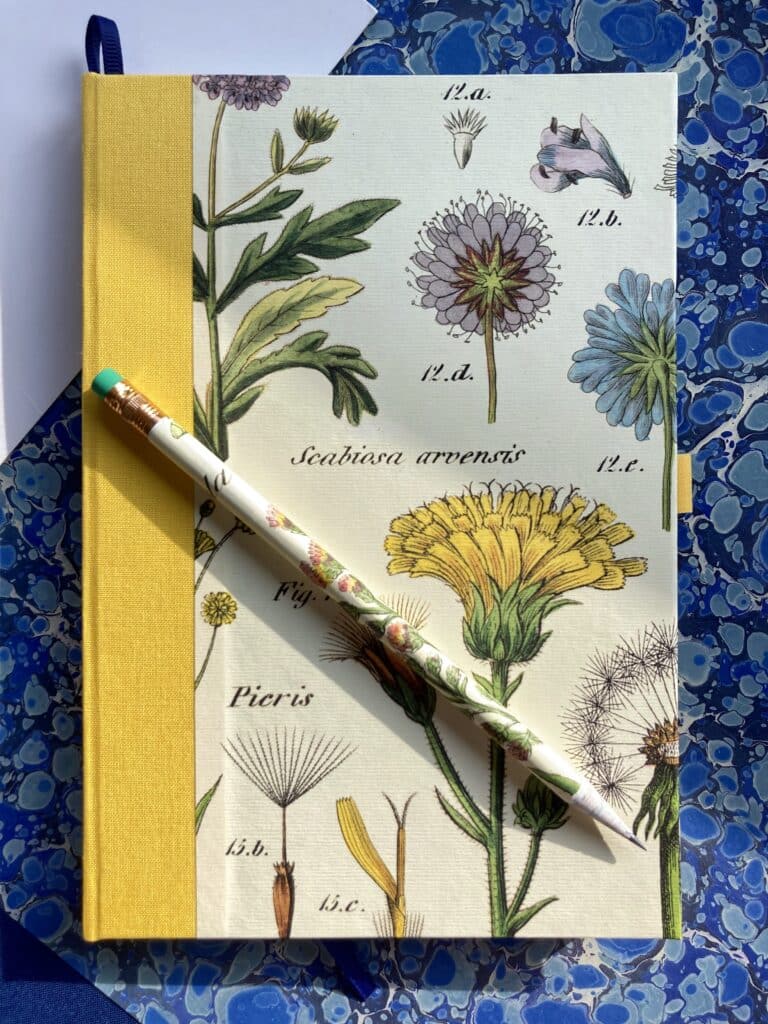
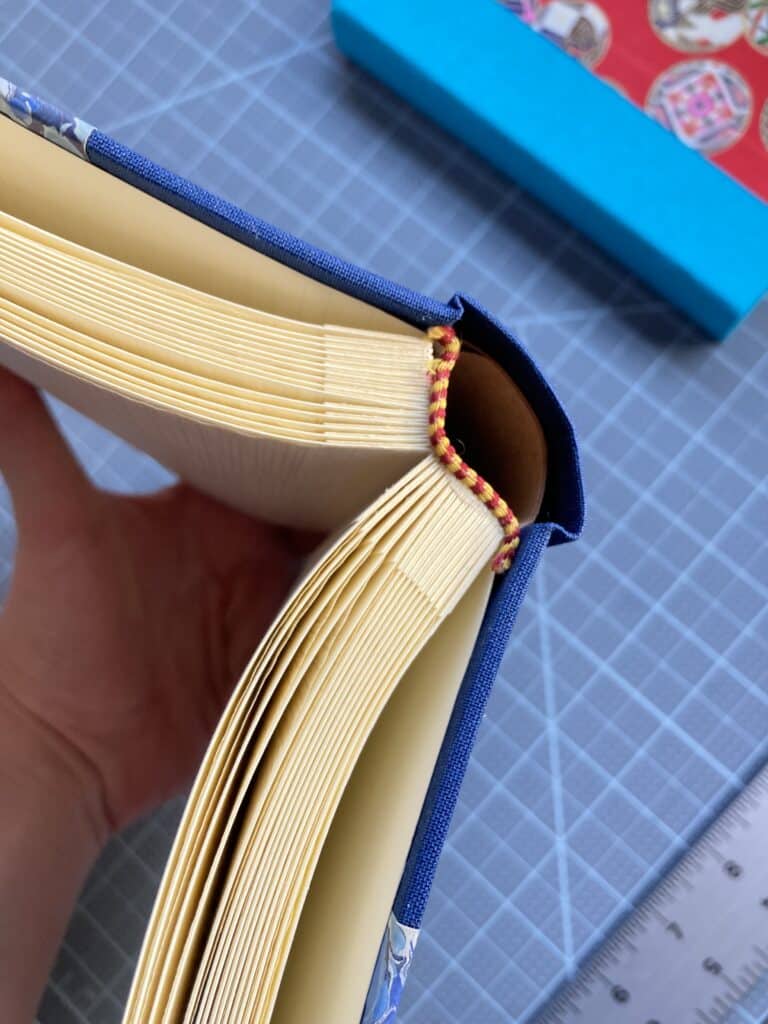
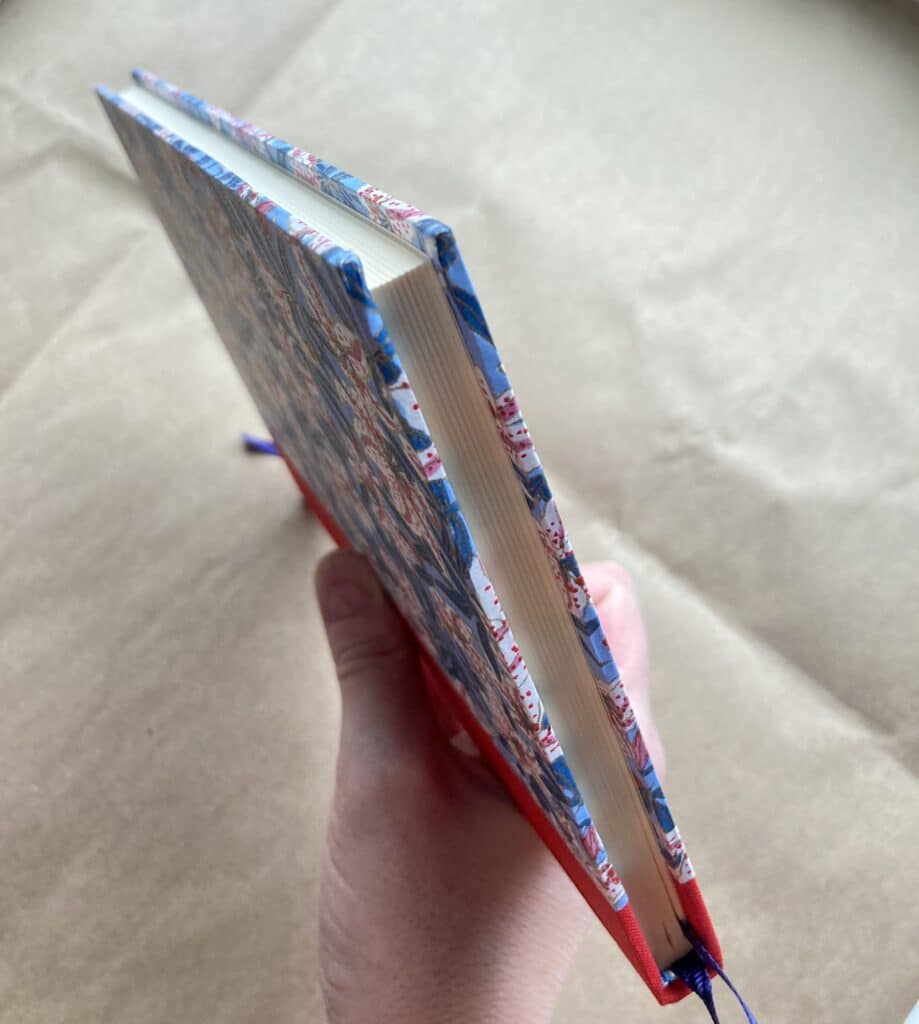
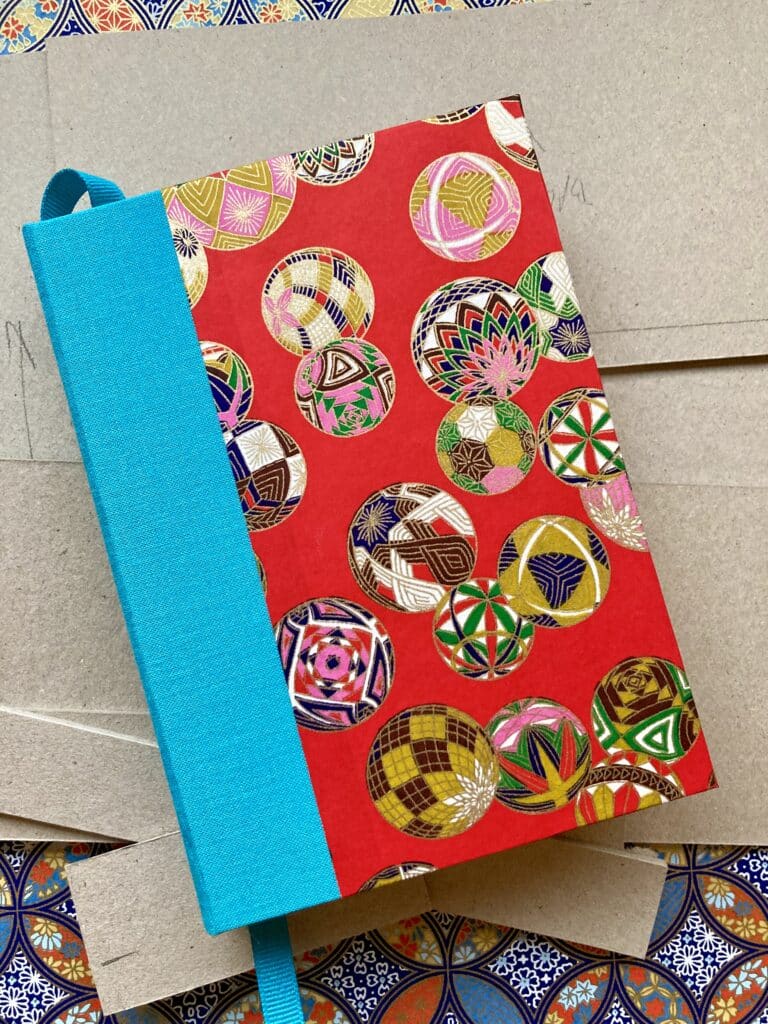
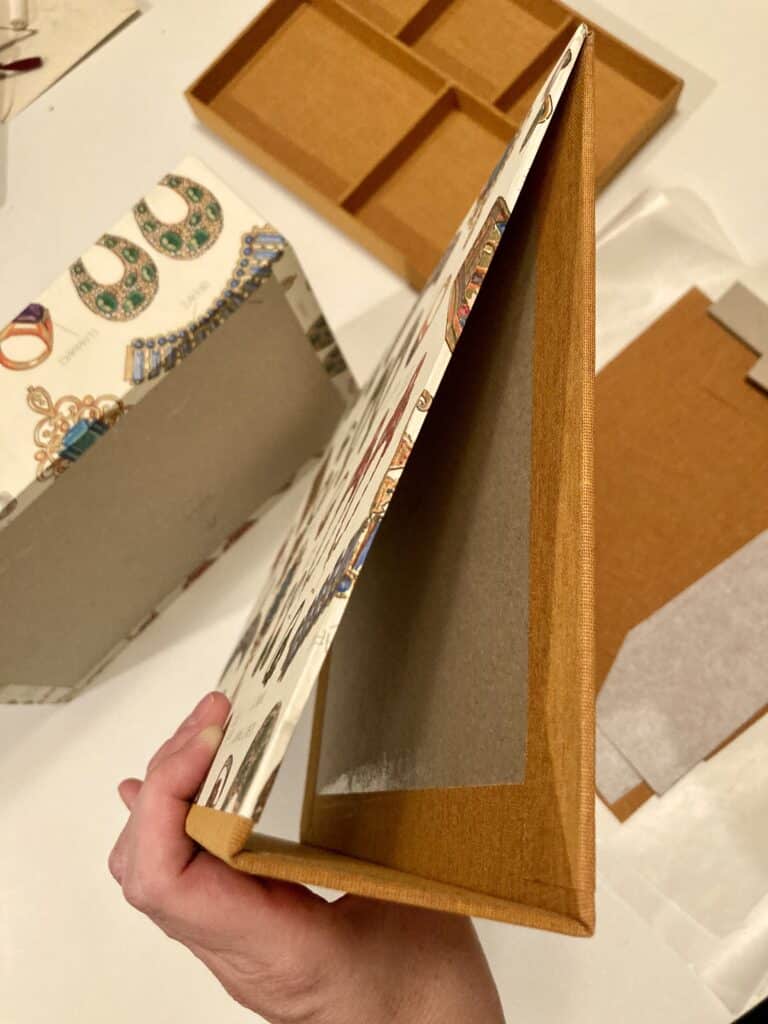
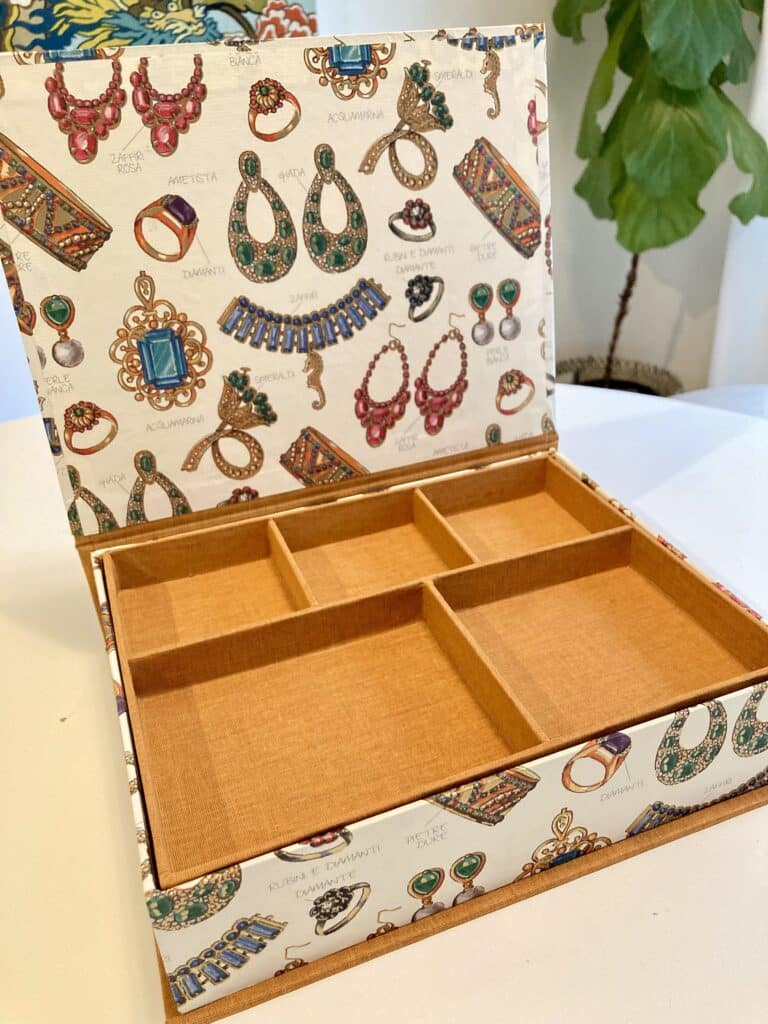
But the best part about making your own text block? You get to add DECORATIVE ENDPAPERS! Imagine the print mixing possibilities. I added endbands, too, because always add more pattern:


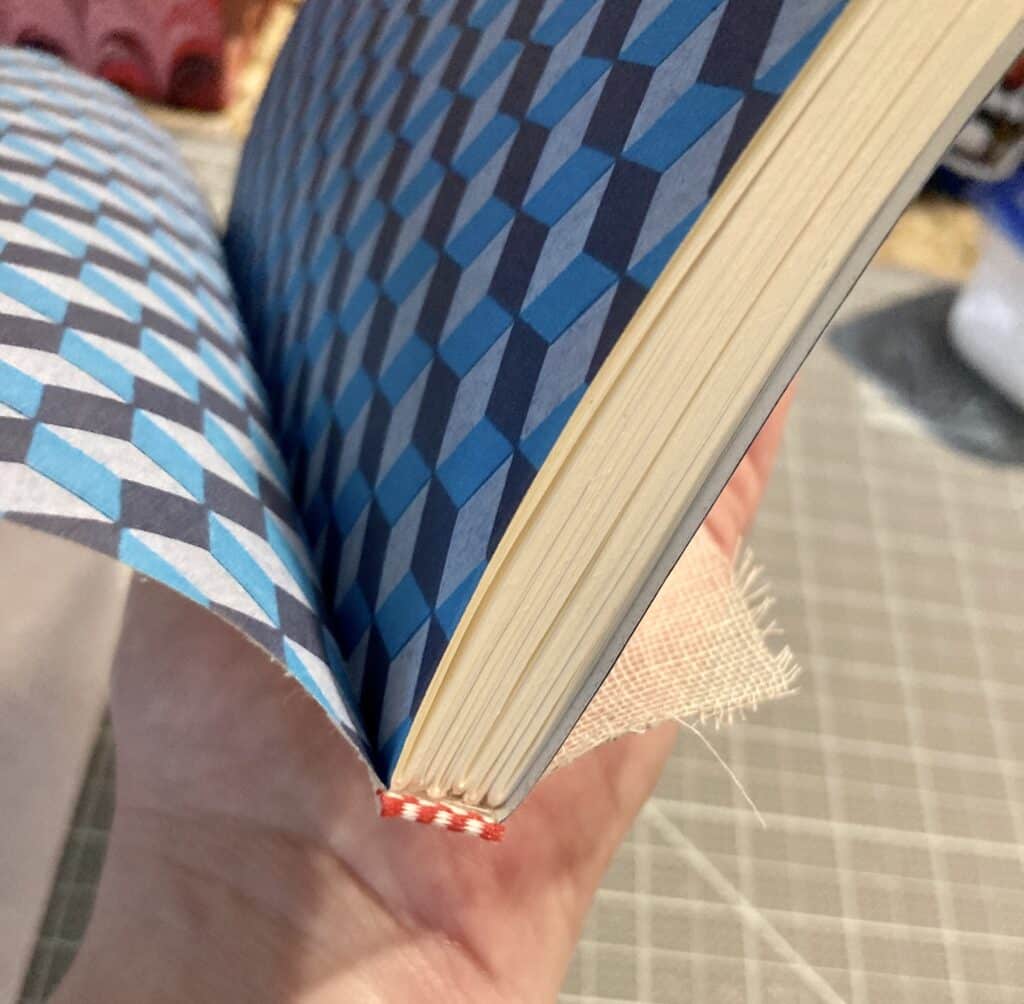
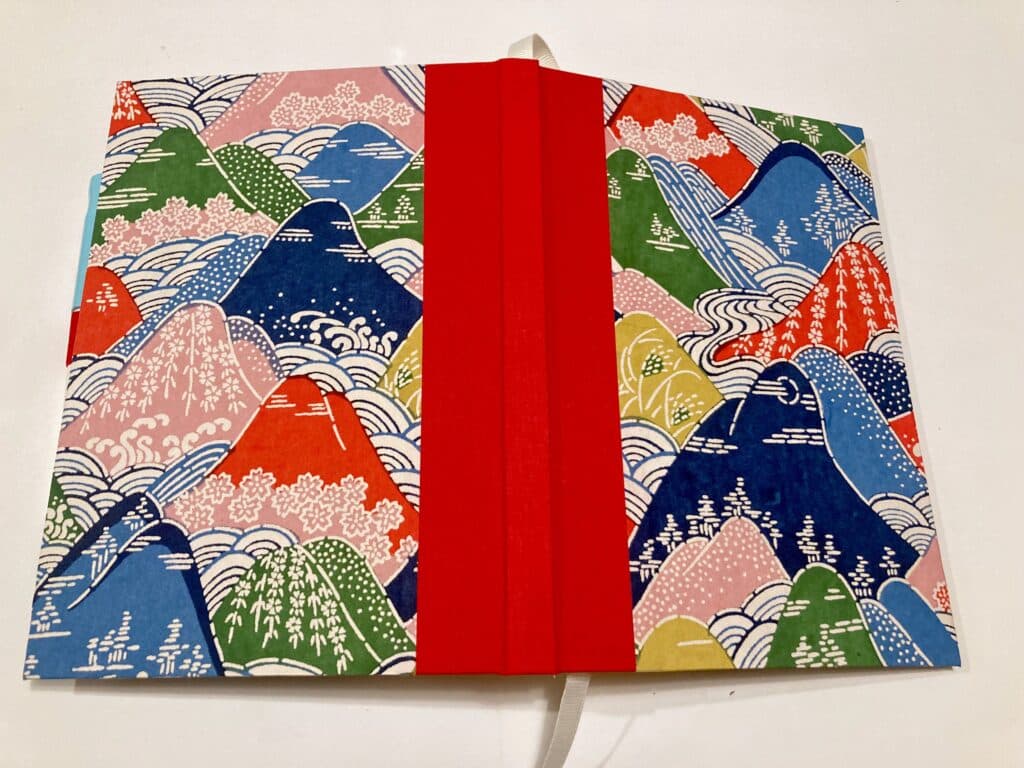
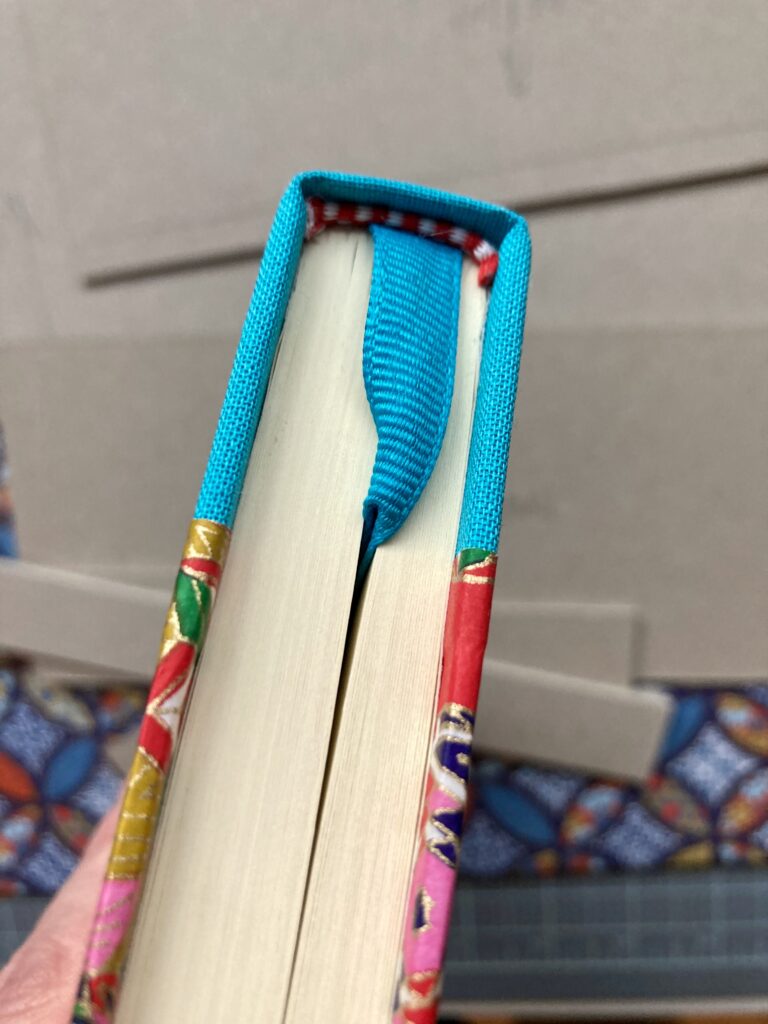
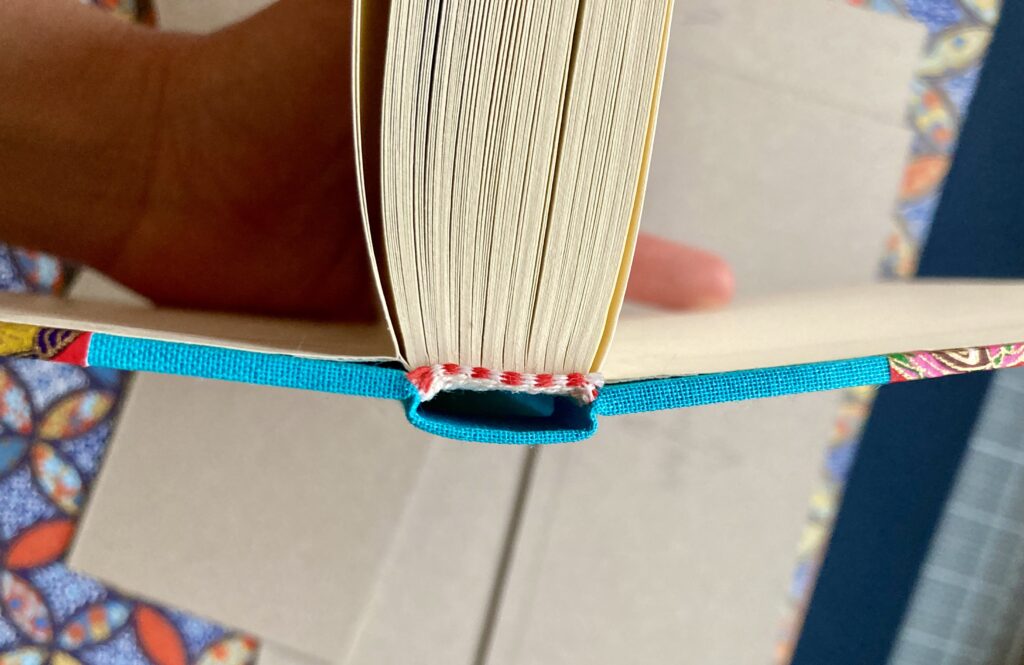
I also put in a pen loop, just sewing a loop into foldover elastic and tucking it between the back cover board and the endpaper.


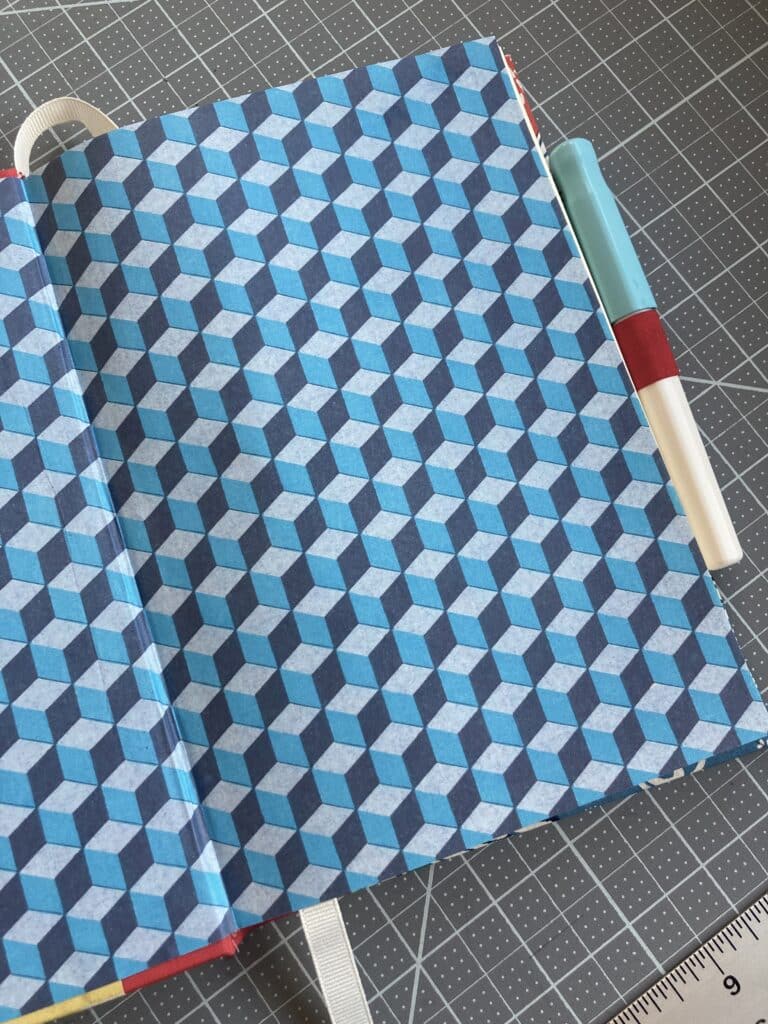
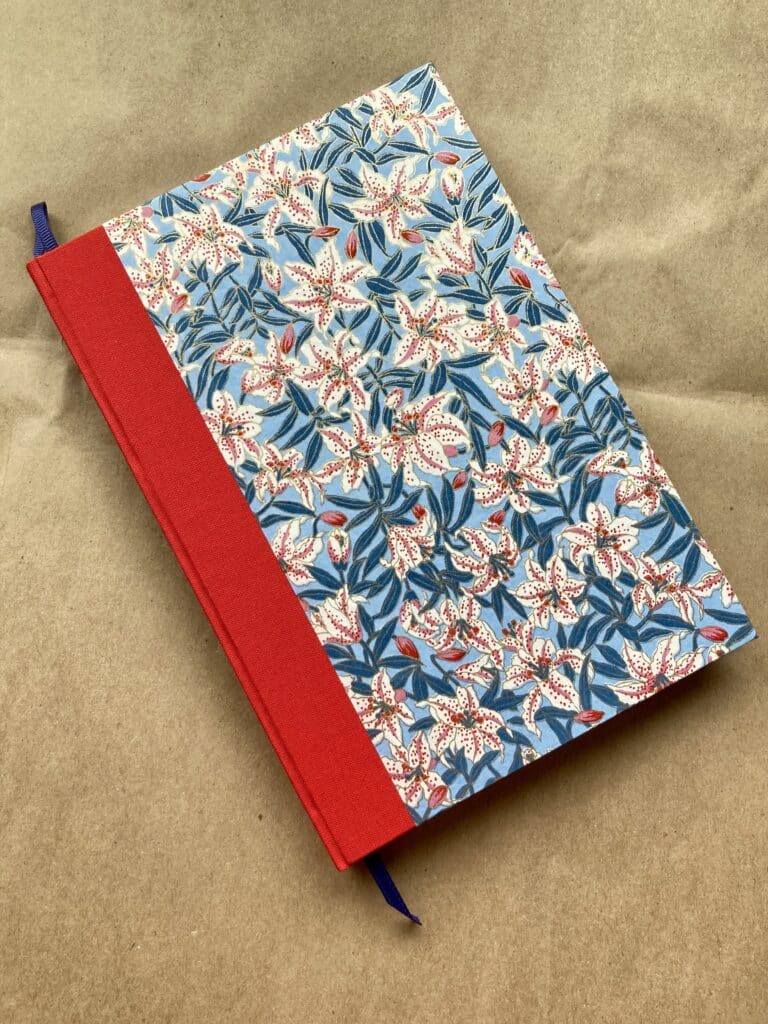
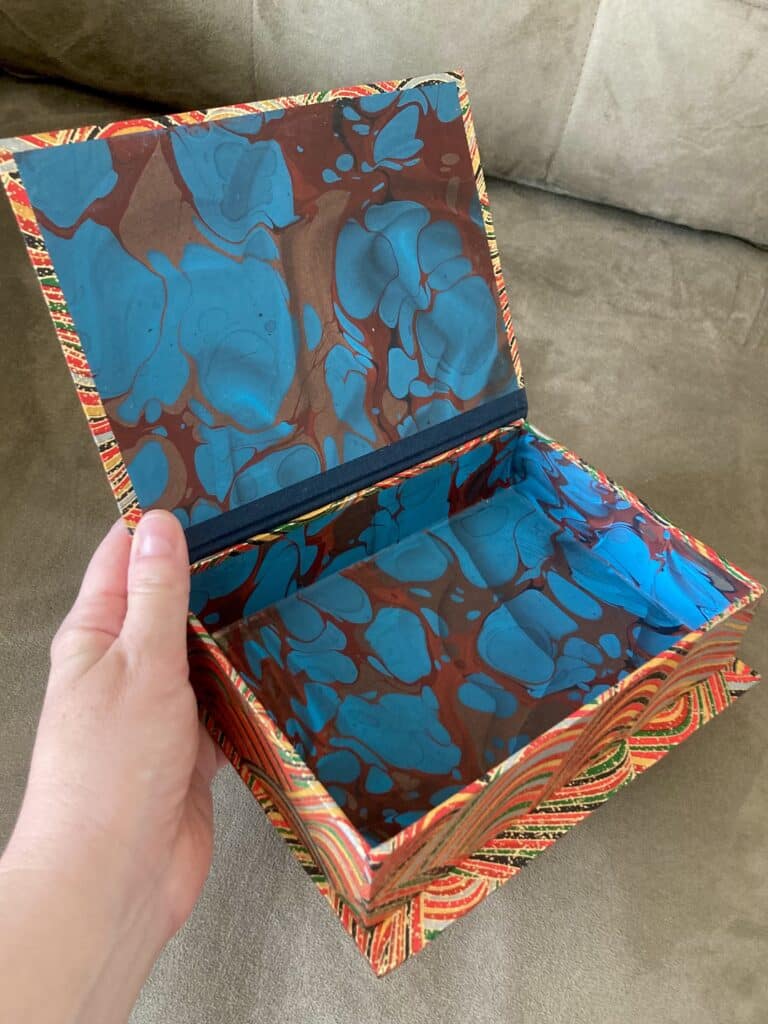
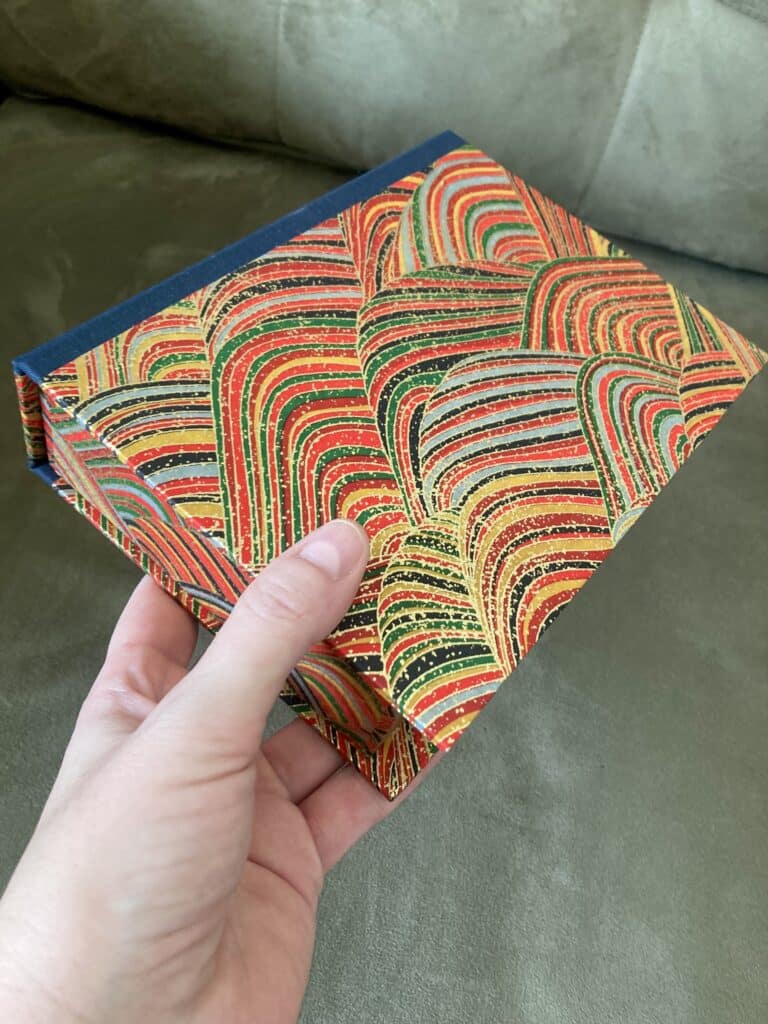
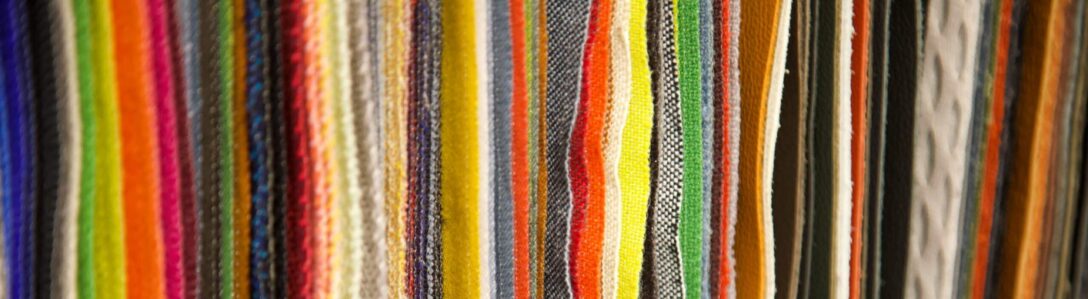
I’m in love with the cover paper–mountains and colors, some of my favorite things. It’s katazome paper (bought here) which is stenciled and resist dyed, vs the chiyogami paper I’m more familiar with, which is silkscreened. Either way, it’s great and I wish it were available on fabric, too.

New Hobby? Make Some Gifts!

The family didn’t escape getting bookbinding presents–Altair got a gardening journal and Skyler got a photo album. Both were quick projects because Hollanders had the text blocks ready to go.

I was pretty pleased with the casing-in on the garden journal. I’m sure it helped that I practiced with mine but this is my best job yet:

I didn’t get a good picture but I put in a loop of foldover elastic between the back cover and end paper to hold a pencil, and then I tried covering a pencil in matching paper for good measure (extremely fun and easy; everyone almost got a bunch of pencils, too).


The photo album needed a “hollow back tube” binding style, which I hadn’t done before. It definitely turned out as instructed, but it’s not the cleanest job (the tube got a little creased on the side).

But it works, and this was an ancillary gift anyway. Skyler’s in the Civil Air Patrol, so I went with their colors in case he wants to do an album of his flights or something.

Back To Bookbinding

It had been a month since I broke out the paper and glue so I did a quick project Sunday night:


This was quick because I used a ready-to-bind text block from Hollanders–this one is printed as a “garden journal” with places for notes and sketches and tips in both Italian and English.

I’m not doing much in the actual ground at this house but I do need to keep track of what’s in the pots and there’s always the dream of The Next House. I liked the lily print washi paper because I’ve had pretty good success with day lilies here.

Construction-wise, this was my best casing-in job yet–look at those even fore-edges!

In the last month I did think, “What if bookbinding was just a flash in the hobby pan?” but as much fun as I had coming back to it, I don’t think it will be.

Trays: Like Boxes But No Lids

What else can you make out of book board and paper? Why not some trays? They’re pretty much just the bottoms of boxes and then every item in your house can have a receptacle.

The green one is a tray to hold hand lotion on the nightstand and the red one is to hold my wallet and keys. For the red one, I copied the dimensions and doubled base from the large valet tray on the Parvum Opus website, which made figuring out the measurements really easy.


The double-thick base is a nice touch and makes the tray feel pleasingly hefty, even if it eats up the book board. It’s about time to order more (and replace that red marble paper that I finally used up).

A Box For Every Item In The House

All of this paper shopping and book binding and box making has thrown me back to when I put wax seals on letters and used fountain pens every day. Working in the stationery store, I accumulated a lot of fountain pens with my employee discount. Why, I wondered, did I have a thousand dollars in fountain pens (in 2006 money; I looked up Mont Blanc’s current prices this morning and fainted) just sitting around in a desk drawer?

Clearly, they needed a special box.

I figured out the size by putting the pens and cartridges on a piece of paper and eyeballing how much room around them I’d need, then used that base to get all the other measurements. This ended up about 10 inches x 4 inches and 1.5 inches high; maybe a little big but now I can put MORE pens in there. (Just kidding, I can’t afford pens now.)

I’m pretty pleased with how I’m figuring out what pieces need to line up. This is my best “box meets spine” alignment yet!

Book #3

When I was ordering book board and supplies from Hollanders last month, I saw that they had ready-made text blocks, aka all the pages sewn together and ready to put in a cover.

I added a few to the cart to practice casing in (getting the pages into the cover) and this is the first try with their chonky text block:


Hollanders also had pre-made endbands, or the little woven colored strip that you see at the top and bottom of the spine. (Historically they were hand sewn and helped keep the pages together, but they’re just decorative now in commercial binding. I am not to the level of learning to sew endbands yet.)


Making the cover is no big deal at this point, but casing in is still a little tricky: You have to get everything lined up on both sides while the glue is wet and there’s really no shifting once the covers hit the endpapers. This one didn’t quite get centered top to bottom, but I DID get the spine set well enough to give it the flex it needs to open nicely:

For my third book ever, I’m not mad at it (even if those endbands look a little chewed). Every mistake is progress!

Boxes, Boxes, Boxes

Last week I branched out into custom box sizes, using the formulas in my book to figure out how to make a box big enough to hold post-it notes. Did it work? Yes! Did I use the same formula/notes to make the red box and then the green box, but they ended up having slightly different overhang dimensions? Also yes!

But practice makes perfect, and I’m still practicing.

Fair warning now: If I know you, there’s a non-zero chance that your gift this year is going to come in a homemade box. (The green box is actually going to hold carwash tokens for my friend’s traditional Christmas gift; I used paper from his store for it.)

Like Legos, But With Glue

I finished another project from the Constructing and Covering Boxes book. The book outlines every step you need to do and gives you all the measurements, so all you have to do is follow the instructions… and we know how I feel about that.

You even start with rectangles!


And you end up with something pretty impressive!


It’s interesting to compare this new hobby to sewing–there was a learning curve on the different papers, just like figuring out which fabric is best for which project. (This Florentine jewelry print is much thinner than the Japanese paper I used before so it wasn’t as forgiving when being glued). There’s figuring out how much material you need–I went through a whole half yard of bookcloth (I thought I’d use half of that). And much like pressing during sewing, you can really improve how things look by just rubbing them with a bone folder.

You can also see how box making evolved straight out of bookbinding: this is the base and lid for the box, but it could also be a hard cover for a (giant) book:


Look at how those pieces all fit together! Exactly like Legos–or even a quilt–but a lot faster.

Wednesday Book Arts: A Box!

I followed the instructions in my Constructing and Covering Boxes book and lo, I have constructed and covered a box:

Is it perfect? No–I messed up the measurements somehow so the fore edge of the lid is a lot longer in front, and there may be some glue spots here and there. But do I love it? Oh yes. Fancy little boxes are deeply satisfying to Past Me, who used a fountain pen in eighth grade, who worked at a stationery store for six years, who still thinks about “the writing desk facing the windows of azaleas” scene in Rebecca. 

In fact, the hand-marbled Italian paper I used for this first box was from my time at the stationery store (which ended in 2006, so…).  Finally I have a reason for moving it from apartment to apartment to house for years!